Vercos ERP: The Ultimate Quick-Start Guide for Makers
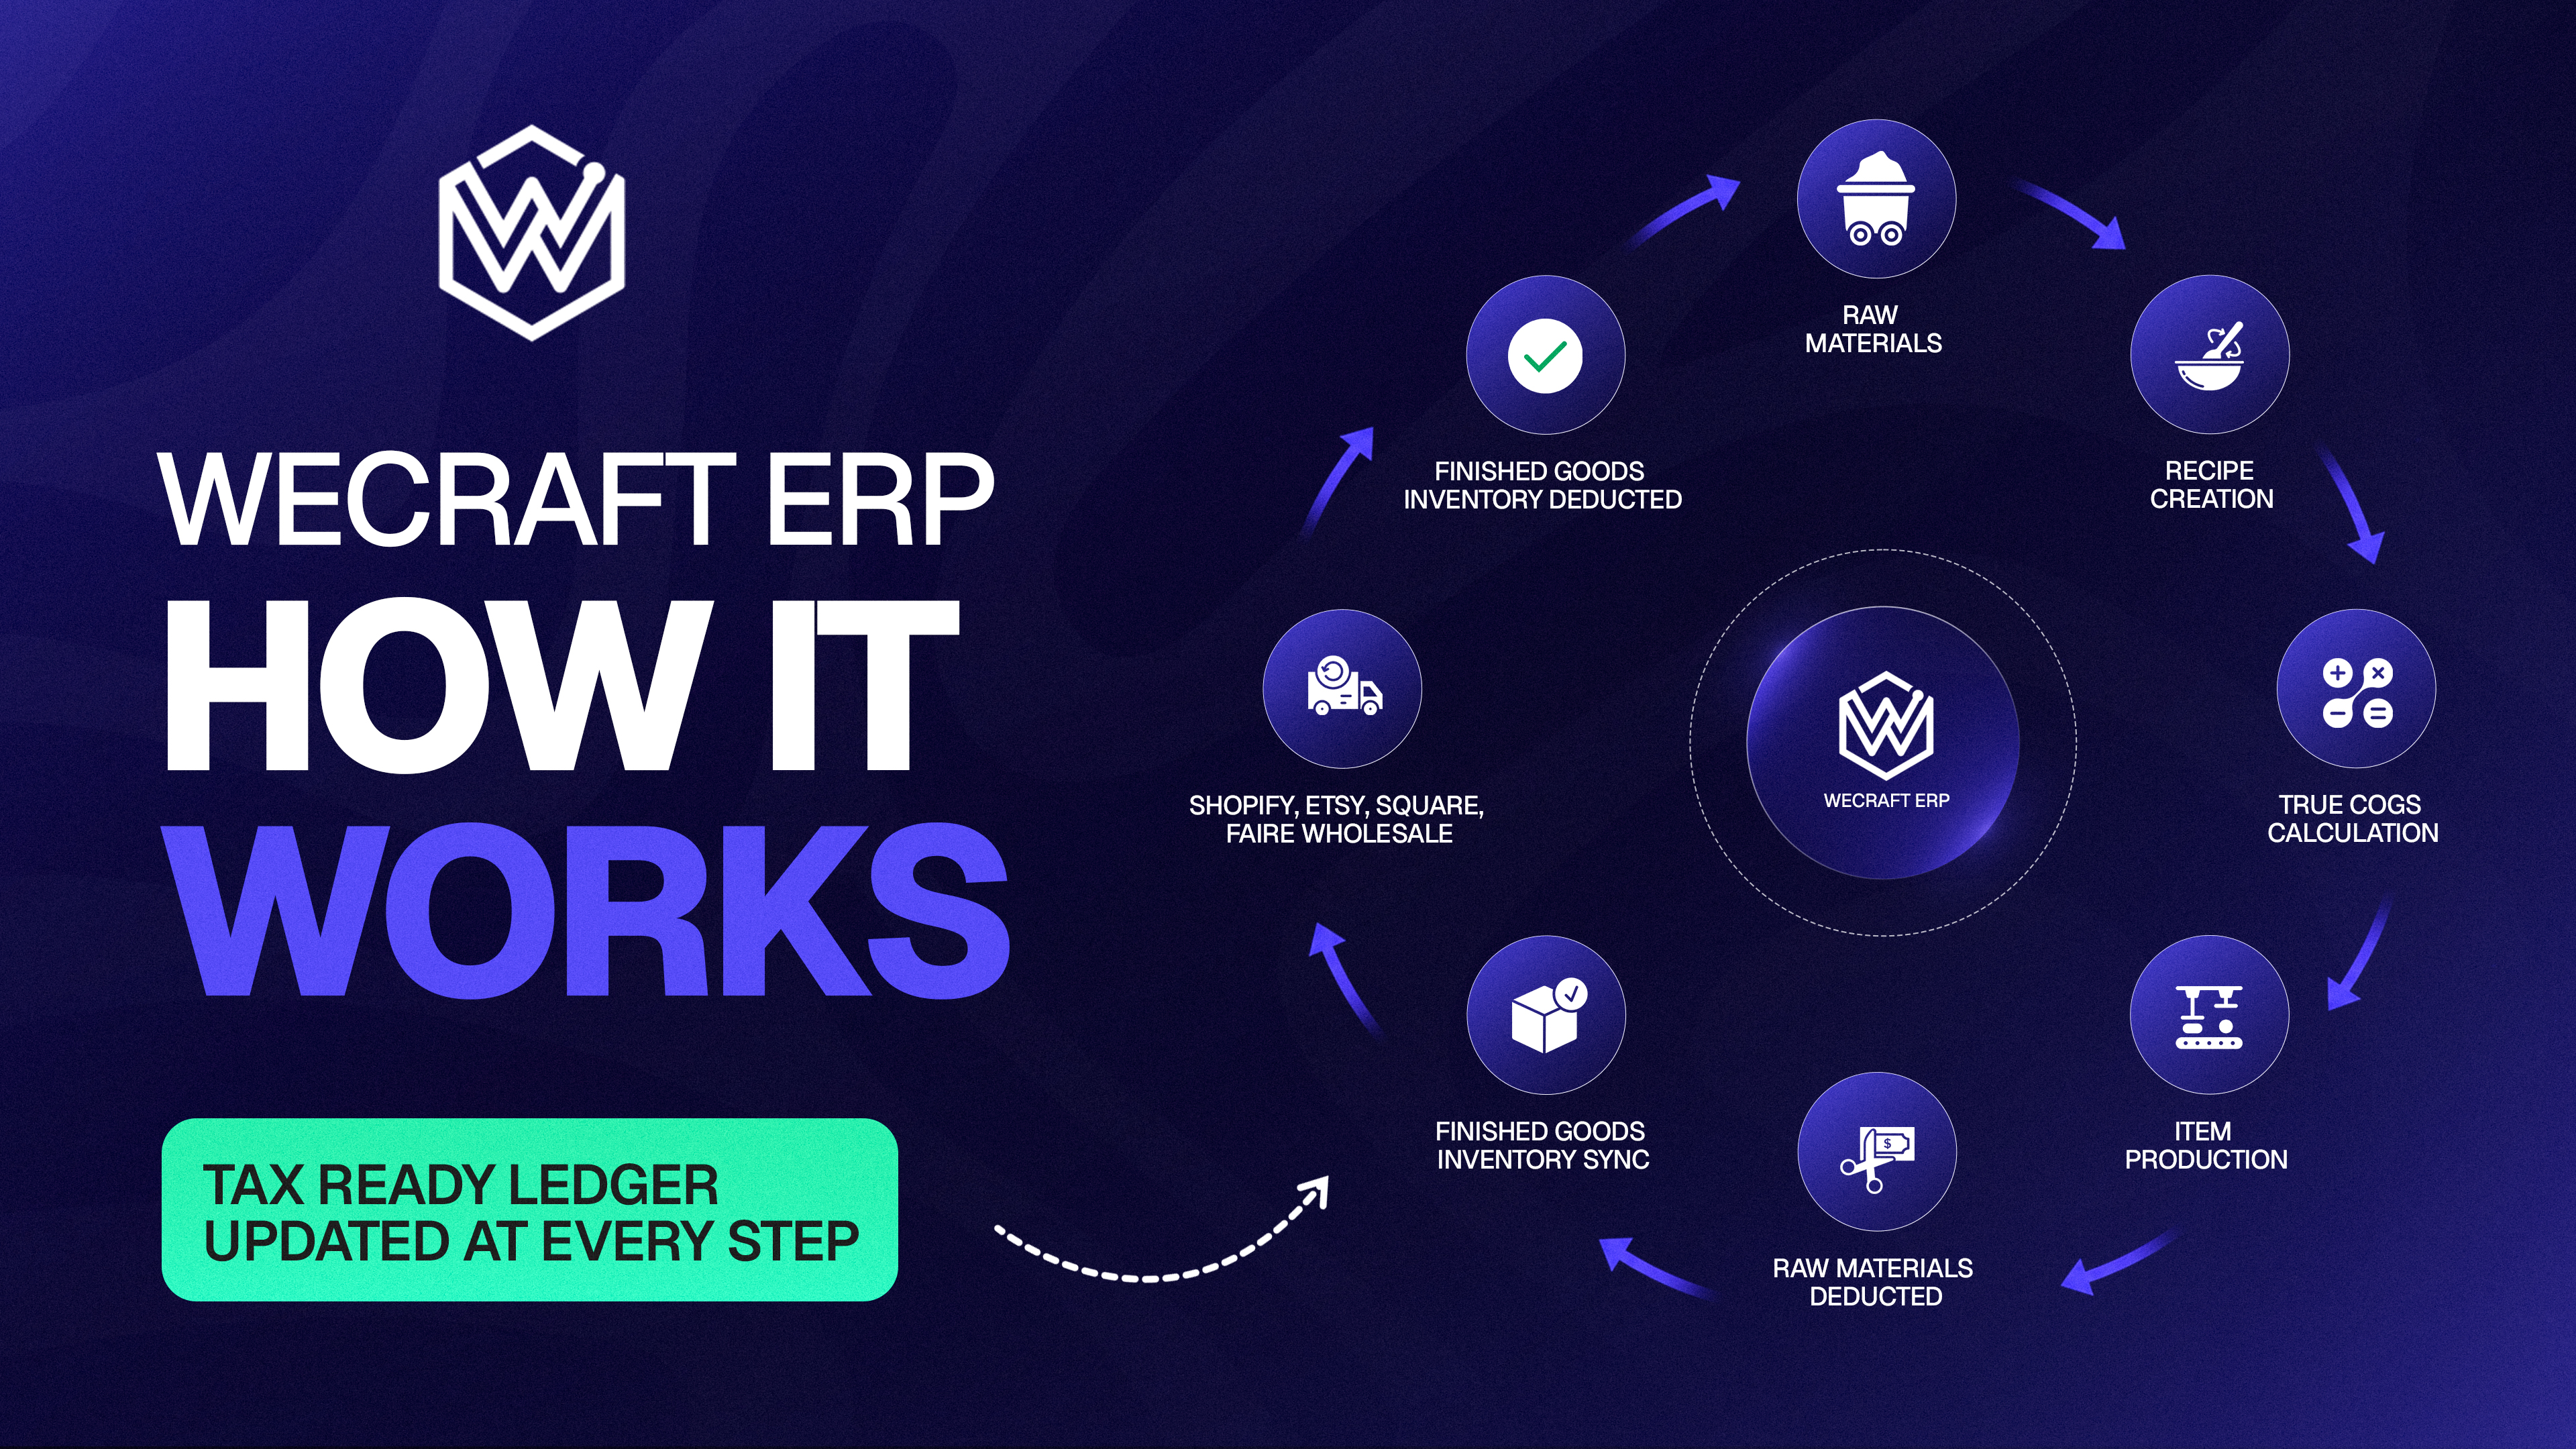
Welcome to Vercos ERP! Think of this platform as the "brain" of your workshop. It keeps track of every screw, every fractional gram of wax, every penny, and every order so you can step away from the screen and focus on what you do best: making things.
This guide is written by a maker, for a maker. We know how painful it is to drown in spreadsheet chaos, so we engineered a platform to fix it. Let's walk through exactly how to set up your business from scratch, step by step.
Step 1: Create Your Account & Brand Identity
Before we can organize your shop, we need to know who you are!
Go to the Sign Up page and create an account. The Onboarding Wizard will pop up. Here, you'll enter your Business Name, your name (the Maker!), and select Manufacturing / Makers as your business type.
Upload your brand logo. This logo will automatically appear on your invoices, purchase orders, and PDF reports, keeping your brand looking incredibly professional.
Step 2: Map Out Your Physical Space (Warehouses)
Where do you keep your stuff? We need to tell the system where things live.
Go to the Supply & Inventory section and open the Warehouse / Locations settings. Click Create Warehouse and name your spaces.
For example: Main-Workshop, Garage-Storage, or Finished-Goods. Tip: Vercos automatically formats the names for you to keep your tracking clean!
Step 3: Add Your Suppliers (Vendors)
Who do you buy your wood, screws, fragrance oils, and packaging from?
Stay in the Supply & Inventory section and find Supplier Management. Click Add Supplier and enter their details (e.g., "Home Depot", "Uline", or "Local Lumber Yard").
Give them a short 3-letter alias (like HOM or ULI)—this helps the system generate clean barcodes later on.
Step 4: Log Your Raw Materials (The Building Blocks)
Now we need to tell Vercos what materials you buy and how you buy them.
Go to the Supply Inventory Tracking Ledger and click Add Raw Material (or Deploy New Batch).
The Golden Rule: You buy things in Purchasing Units (like "Cases" or "Boxes"), but you use them in Consumption Units (like "Pieces" or "Grams").
Example: You buy a Case of screws from Home Depot, but your recipe only needs 4 Pieces. The system will ask you how many pieces are in one case so it can do the fractional math for you. Tell the system which Warehouse the material lives in, and hit Save.
Step 5: Log Your Machines & Preventative Maintenance
Your machines cost money, and every time you run them, they wear down. Vercos tracks this so you know your true costs and exactly when to service them.
Navigate to the Overhead & Expenses tab and find the Machine Depreciation section. Add your tools (e.g., "CNC Router", "Table Saw", "3D Printer").
Enter how much you paid for it, its expected lifespan (in hours), and its Maintenance Interval (e.g., lubricate rails every 100 hours). Vercos will calculate your true run-cost per hour and track your maintenance progress automatically!
Step 6: The Hybrid Production Board (Recipes & Services)
How do you make money? Vercos adapts to your flow!
Go to the Production Board. Notice the toggle at the top? You can switch between Standard Batch (for identical physical goods) or Custom Commissions (for service-based multi-stage pipelines).
For Batch jobs, click Create New Recipe. Add the raw materials from Step 4, plus your labor and machine time. The system will magically calculate your exact Cost of Goods Sold (COGS), down to the penny!
Step 7: Connect Your Sales Channels (Shopify / Etsy)
Instead of manually typing in every sale, let's make Vercos talk to your online stores.
Head over to the Integrations or Settings tab. Find the connections for Shopify or Etsy. Follow the prompts to log into your store and authorize Vercos. Boom! Now, every time someone buys your product online, Vercos will know about it and tell you exactly what you need to build.
Step 8: Start a Production Run! 🔨
Time to get your hands dirty!
On the Production Board, drag your job through the pipeline. When you finish building and drag the job to Done, the Job Completion Modal pops up.
Machine Utilization: In this modal, select the machine you just used and type in how many hours it ran. Vercos will automatically deduct any required materials from your warehouses, log the finished goods, and route the machine hours straight to your Deductions tracker to advance your maintenance progress bar!
Step 9: Fulfill Orders & Make Money
When a customer buys that table on your Shopify store, the order pops up in the Order Fulfillment Center. The system sees you have the table in Finished-Goods and automatically reserves it for the customer. You pack it up, print the label, and mark it as fulfilled. No more accidental overselling.
Step 10: Manage Wholesale & B2B Customers
Ready to sell in bulk?
Open the Wholesale / B2B tab to manage your B2B customers. You can add new B2B clients, assign them custom discount percentages, and provide them with a dedicated wholesale storefront link! Enable "Wholesale" for specific recipes so your B2B clients can bulk-order them seamlessly.
Step 11: Meet Your AI Virtual Assistant
Have a question about your data or need business advice?
Open the Virtual Assistant Chat right in your dashboard. Our built-in AI is ready to help you analyze your costs, answer platform questions, and guide your business decisions on the fly.
Step 12: Invite Your Team & Professionals
Don't do it all alone!
Head to the Settings -> Team Management section. Here, you can invite your employees or give special, secure read/write access to your Accountant or Business Consultant.
Step 13: Secure Your Account & Setup Alerts
Keep your business data safe and stay informed.
In the Settings menu, enable Two-Factor Authentication (2FA) using an Authenticator App or SMS. Add your Notification Email to receive daily alerts on low stock levels, tax liabilities, and subscription renewals.
Peace of Mind: If you ever encounter an error while working, our Automated Bug Catcher instantly logs a secure ticket to our engineering team, ensuring a prompt reply and rapid resolution!
🎉 You're Done!
That's the entire loop! As you keep running your business, Vercos will automatically track your stock levels, tell you exactly when to reorder raw materials, and show you exactly how profitable every single item is.
Reclaim your weekends. Ditch the spreadsheets. Happy crafting!
TL;DR Summary
- Set Up Your Brand: Create your account and upload your logo to brand all your invoices and purchase orders automatically.
- Map Your Workshop: Define your physical storage areas (like "Main Workshop" or "Finished Goods") to tell the system exactly where items live.
- Track Suppliers & Raw Materials: Add your vendors and input materials using fractional math (e.g., buying a bulk box but tracking usage down to the exact piece or gram).
- Automate Machine Costs: Log your tools (like 3D printers or CNCs) to automatically calculate hourly depreciation and track maintenance intervals.
- Calculate Exact COGS: Use the Production Board for both batch runs and custom commissions to figure out your precise Cost of Goods Sold down to the penny.
- Sync Your Online Stores: Connect Shopify and Etsy so incoming online orders automatically tell your shop what needs to be built.
- Log Production Runs: Drag jobs through the pipeline to instantly deduct used materials from your inventory and log machine wear-and-tear.
- Manage Fulfillment & B2B: Fulfill retail orders seamlessly, and set up custom discount tiers and portals for your wholesale/B2B clients.
- Leverage AI & Team Tools: Use the built-in AI Virtual Assistant for quick business insights, and securely invite your employees or accountant to your workspace.
- Secure & Monitor: Enable 2FA, set up automated low-stock alerts, and rely on the automated bug catcher for a stress-free digital workflow.